Positioning and Draping
PTA 101 Introduction to Clinical Practice 1
Instructional Use Statement
The following information is used for instructional purposes for students enrolled in the Physical Therapist Assistant Program at Lane Community College. It is not intended for commercial use or distribution or commercial purposes. It is not intended to serve as medical advice or treatment.
Contact howardc@lanecc.edu for permissions
Introduction
The patient's position of comfort is often the position of greatest contracture risk. Attention to correct positioning is relevant to every treatment setting. A contracture is a fixed shortening or tightening of soft tissue resulting in limited motion of the joint. A contraction is a shortening or increase in muscle tension, denoting the normal function of muscle tissue.
Positioning and draping are techniques which maximize patient comfort and dignity, and which minimize injury to tissue. In this lesson, we will define key terms and explore methods for proper positioning and draping. Techniques covered in this lesson will be implemented in laboratory practice, skill checks, and formal testing.
Course level objectives:
Describe theory, therapeutic benefits/outcomes, and application (precautions, contraindications, and procedures) of interventions used to promote healing, functional recovery, and pain management - positioning
Lesson Level Objectives
- Use correct medical terminology to describe a patient position activity during a case simulation activity.
- Define incidence, etiology, and stages of pressure sores.
- Identify basic treatment interventions for prevention and treatment of pressure sores.
- Describe common contractures and primary medical and secondary conditions that may be affected by poor positioning.
- Describe how draping demonstrates respect for the individual in the context of the health care setting
- Describe how positioning and draping influences treatment in various treatment settings (outpatient, inpatient, skilled nursing).
Preparing for Success - Textbook and Lecture as Sources
This video provides some suggestions for how to organize your study so that you can be efficient with your time, and through a systematic approach, learn course objectives at the level you need to succeed in lecture and lab. Note - some of the objectives have been updated since the video, but the strategies for success are still the same.
Why is Effective Positioning So Important?
- When joints and soft tissues are held in one position for an extended period of time, a joint or muscle contracture can develop. Loss of motion leads to loss of function. Tight, stiff joints and muscles become painful to move.
- Sleep and rest times are disturbed by pain due to malpositioning. Rehabilitation is impacted by poor sleep and transition to sleep is challenged by poor positioning in bed.
- Circulation, lymphatics, nerves, and skin maintain are at risk for long-term injury with prolonged compression. Pain, swelling, pressure sores, numbness and tingling, and weakness can all result if your patient is positioned improperly
- Positioning provides proprioceptive input (joint position) to the nervous system. With proper positioning, patients can begin to reintegrate information from their eyes and bodies to improve function and progress through rehabilitation
- Pressure sores place patients at significant risk for infection. Recovery can take many months and require frequent (and costly) treatments with nursing and wound specialists. Pressure sores can lead to amputation.
- Patients with impaired sensation and impaired language function may not be able to feel pain from ischemic compression from soft tissues. Frequent skin check and position changes can prevent tissue injury. If a reddened area does not return to normal after an hour of pressure relief, close monitoring of this area is indicated.
- Comfortable positioning during mat exercises, modality application, and manual techniques is essential for a patient-centered approach to treatment. Therapists must actively seek feedback from patients and show a willingness to adapt an exercise or other treatment modalities based on the positioning needs of the patient. Pillows, towel rolls, bolsters, and wedges are some examples of devices in the rehab department which allow both comfort and access during treatment. This leads us to draping.
Why is Effective Draping So Important?
- Draping lets your patient know you are concerned for their privacy and modesty. It sends a message that you are working clinically when providing hands-on care.
- Draping prevents inadvertent soiling during bedside activities. This is particularly true for draping in the pelvic/genital area when performing lower extremity ROM in the in-patient and skilled nursing facility settings.
- Creases in pillows, sheets and bed coverings can result in increase shearing and pressure forces to the skin. By taking time to effectively drape during positioning, you are preventing pressure sores
- Draping includes pulling the hospital or other privacy curtain when a body part/segment is exposed. Knocking or asking for permission to enter before accessing a patient space is an essential component of effective draping.
Applying Anatomical Planes and Direction of Motion
Describe normal movement and abnormal movement conditions, such as restricted movement or contracture, is based in a uniform use of anatomical position, planes, and axes of motion. As mentioned in our discussion of body mechanics, there are three anatomical reference planes: sagittal, frontal, and transverse (horizontal). There are three reference axes in each plane that are used to describe motion: frontal, sagittal, and vertical:
- Flexion / extension: Movement occuring in a sagittal plane across a horizontal axis
- Abduction / adduction: Movement occuring in a frontal plane across a sagittal axis
- Rotation (medial/lateral or external/internal): Movement occuring in a transverse (horizontal) plane across a vertical axis.
As you review the images and descriptions of the common contractures below, note the contracture is named based on the direction of the motion restriction.
Common Contractures
|
Area
|
Clinical Considerations
|
Image
|
|
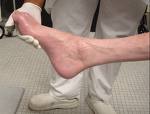
ankle plantar flexion
|
prevented or minimized with braces, splint, weight bearing (e.g., standing) and habit modification (footwear)
|
|
|
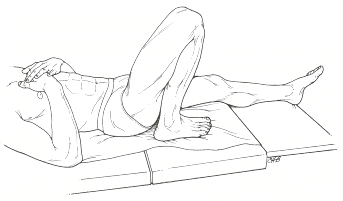
hip and knee flexion
|
generally initiated with prolonged positioning with pillows under knees
if patients are using a gatched bed (mattress bows at pelvis with HOB and feet elevated), risk for hip flexion contracture increases
certain neurological conditions will cause the hip and knee to pull into flexion when at rest
|
|
|
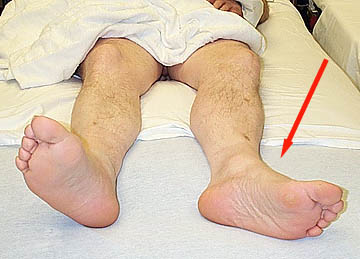
Hip external rotation
|
External rotation is the "open" position of the hip joint. When there is significant extremity weakness, external rotation tendencies are often difficult to avoid
|
https://instruct.uwo.ca/kinesiology/222/Lab6/Lab6_Images/Fig4a_hip_fracture_patient_leg_external_rotation.jpg
|
|
Cervical flexion
|
Patients are at risk cervical flexion contractures when positioned with too many pillows or with HOB > 30 degrees for extended periods. Some patients with swallowing restrictions or dysfunction, cardiac condition, lung condition can not safely lie flat. These patients have higher cervical flexion contracture risk
|
|
|
Wrist flexion
|
increased spasticity of muscles from neurological disease or injury or general disuse
generally accompanies finger and thumb flexion contractures
|
|
The Life of a Pressure Sore
Pressure sores are noted and documented based on STAGES of tissue responses to pressure and shearing.
The two hour guideline for checking in with patients/residents and assisting with a change in position for pressure sore prevention is based on the amount of time it takes tissue to progress from Stage 1 to Stage 2 pressure sore.
|
Stage
|
Description
|
Onset
|
Signs
|
Resolution
|
Image
|
|
1
|
Non-blanching Hyperemia (redness that does not turn white when you push on it)
|
within 30 min
|
skin redness; patients with dark skin may have discoloration instead of redness
|
1 hour after removal of
|
|
|
2
|
Ischemia (decreased oxygen delivered)
|
2-6 hours
|
skin blanching (whiteness)
|
36+ hours and after removal of pressure
|

|
|
3
|
Necrosis (tissue death)
|
6 hours
|
skin blueness, hard lump
|
varies (days/weeks)
|
|
|
4
|
Ulceration
|
Within 2 weeks of necrosis
|
ulceration, infection, bony prominences involved
|
months; frequently requires surgical repair or amputation. May be fatal
|
|
Role of the PTA in Pressure Sore Treatment
A physical therapist evaluates and checks the skin conditions as part of routine care for clients under their care. PTs/PTAs check the epidermis, the dermis or the underlying area of tissue damage. This may include the muscles, tendons or bones. Wound care and dressing changes are within the scope of practice for PTA, however, treatment is complex. A PTA involved in direct wound care is likely to have significant clinical experience and additional continuing education in wound care
Wounds will not completely heal unless the underlying cause of the pressure sore is addressed. Reduction of pressure and prevention of future breakdowns are a PT/PTAs top priority. A procedure to assess the amount of weight bearing across the pelvis is called pressure mapping. Pressure mapping may be recommended to assess specific pressure loads when a patient is sitting in a wheelchair so an optimal wheelchair cushion and seat back can be identified. A wheelchair seating vendor, occupational therapist (OT), nursing and physician are often part of the health care team providing assessment and treatment for pressure sores.
Summary of Positioning Procedures
The table below summarizes some basic positioning procedures for clinical treatment and interventions. These procedure are for comfort. A risk of prolonged positioning in a preferred position (e.g., geriatric patient who likes to sit up in her wheelchair to watch an NFL game and post-game highlights) is at risk for progressive loss of joint and soft tissue motion. As you read your text and review the procedures, consider which structures are at risk for contracture with each position. (Hint: See Box 5-2 in your text).
Take a look at the handout included in the right sidebar on this web page. Here you will find some excellent images and procedures for positioning in bed. We will be practicing these techniques in lab.
|
position
|
head and neck
|
arms/hands
|
legs/feet
|
|
supine
|
small pillow/towel at head and neck
|
positioned at side or supported on pillows; limbs totally supported by bed/mat
|
small pillow behind knees; "float" ankles to decrease pressure; may use towel rolls on lateral leg for neutral rotation
|
|
prone
|
small pillow/towel roll at forehead
|
rolled towel under anterior scapula; hands under head or along sides
|
pillow at anterior lower leg/ankles;
|
|
side lying
|
aligned with trunk and pelvis; supported in midline position; may need bolsters or extra pillows to support trunk in midline
|
upper UE supported on pillows and slightly forward
|
hip and knee flexion with pillow between knees
|
|
sitting
|
support as needed depending on patient function
|
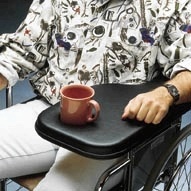
supported as needed for the intervention; lap tray or use of arm rests on w/c for prolonged sitting
|
supported with feet on floor/footrests/stool
|
Considerations for Specific Patient Populations
|
Condition
|
Description
|
Positioning
|
|
Trans femoral amputation
|
A surgical removal of the lower leg above the knee
|
Prone to prevent hip flexor contractures; limit sitting; limit hip flexion
|
|
Trans tibal amputation
|
A surgical removal of the lower leg below the knee
|
Prone to prevent hip flexor contractures; limit sitting; limit hip flexion
|
|
Hemiplegia
|
Condition which may result in significant weakness or spasticity on one side of the body
|
Avoid surgical slings for upper extremity support; use resting hand splints to prevent contractures; monitor head and neck and assist with positioning in neutral; vary position of hip, knee and ankle joints during the day to prevent contractures due to spasticity or decreased use
|
|
Rheumatoid Arthritis
|
An inflammatory disease process which affects joints in the extremities
|
Avoid prolonged immobilization; encourage gentle ROM with progressive return to active exercise as able when symptoms subside
|
|
Burns and Skin Grafts
|
May include harvested (donor) or regenerating skin
|
Avoid positions of comfort; soft tissue stress are necessary to prevent skin (and therefore joint) contractures; coordinate with health care team to assure ROM parameters follow physician orders and PT guidelines.
|
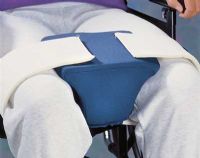
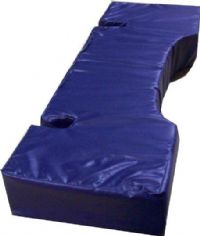
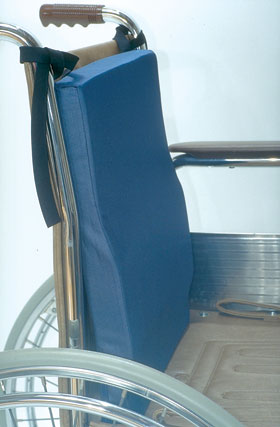
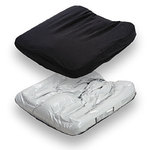
Sample Positioning Devices
Self Study
Use the linked activities to check your understanding of common bony landmarks which are at risk for pressure injuries
-
- pressure risk areas when supine. Link


Optional Resources
The following videos are included to support instruction in the interactive lecture and your course readings. These are optional, so access these as your time and needs arise .. Approaching the material in different ways and different formats helps with both memory and application of knowledge to the clinical setting. Nonetheless, the videos are strictly supplemental. Disclaimer: there are some graphic images of pressure sores.
End of Lesson
Post your questions and comments to classroom forums.
Be sure to check your course calendar for assignments and deadlines